 Zoomed to minimumUse the plus and minus key to zoom and the arrow keys to pan
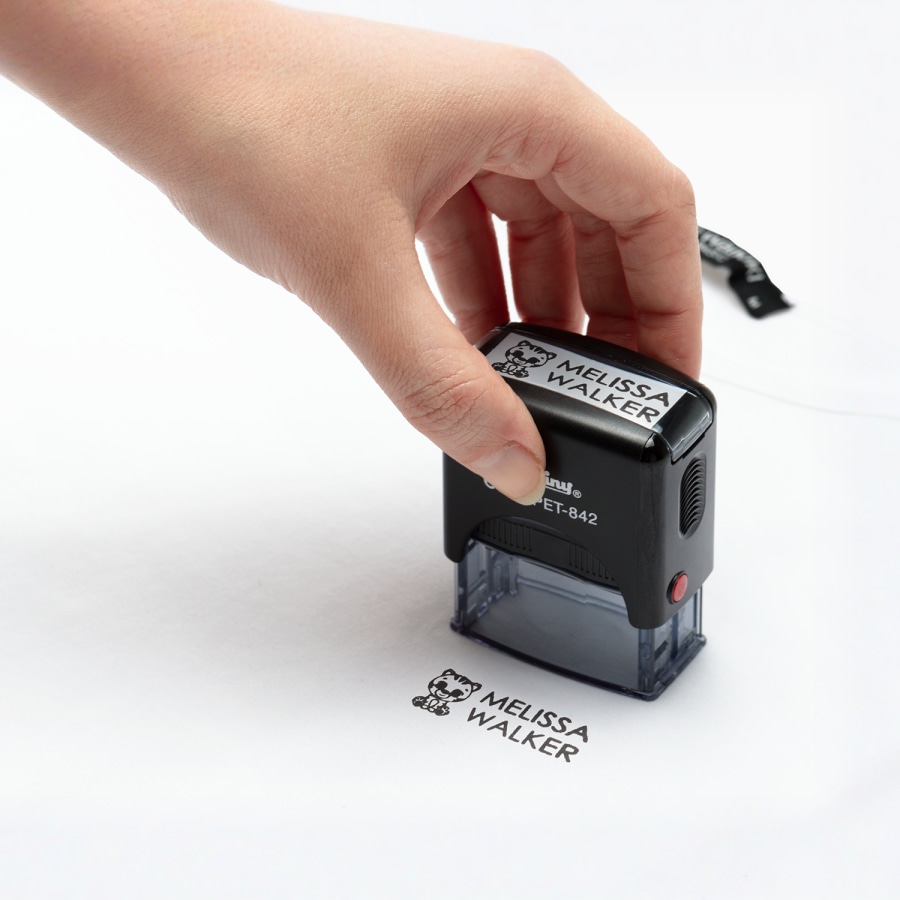

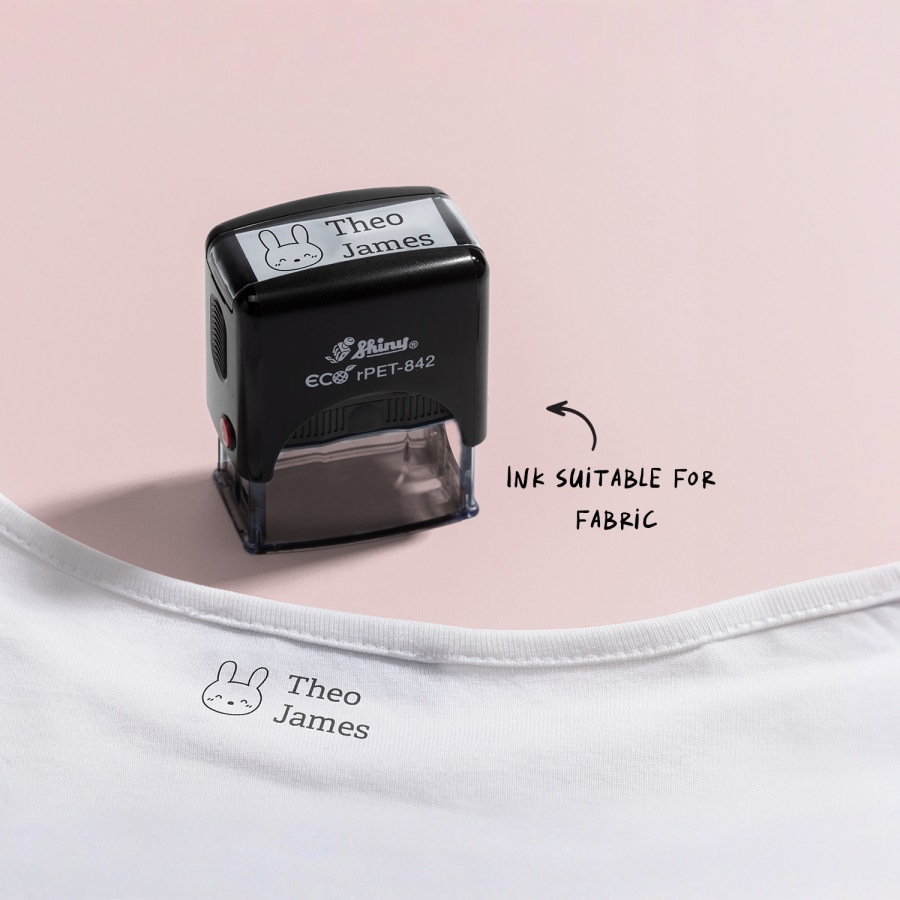
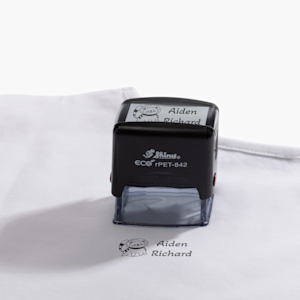
Clothing Stamp
Personalise everyday items and save time with custom clothing stamps.
- 39 x 14 mm impression size
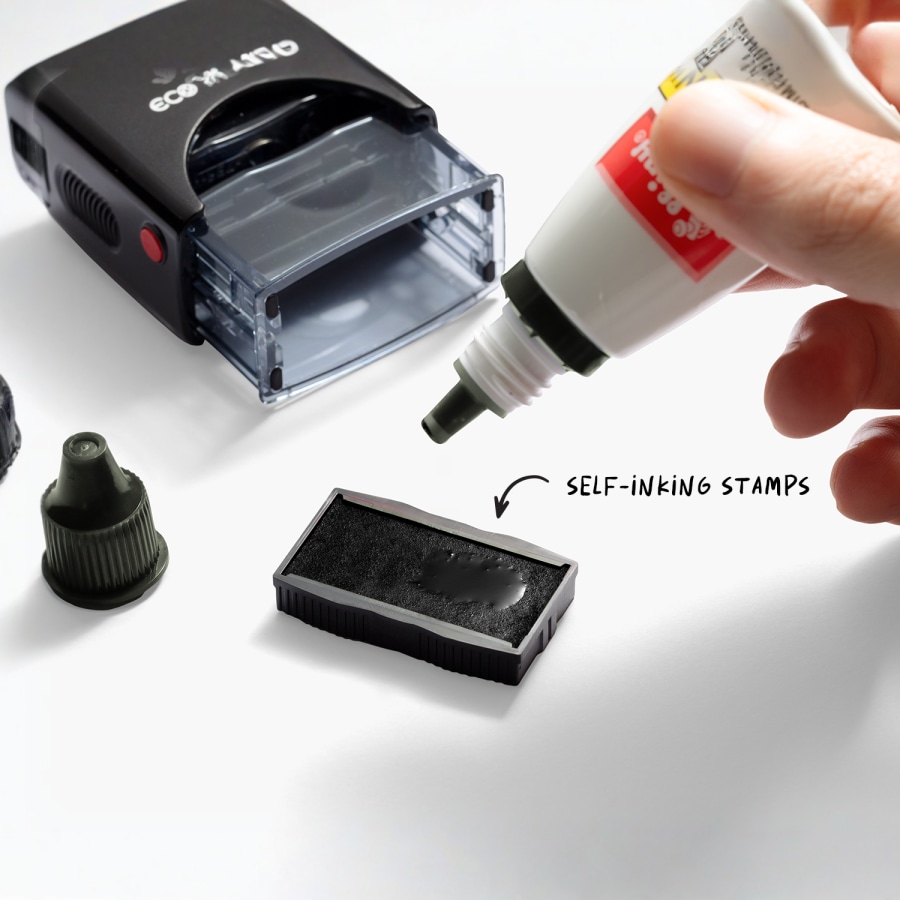
- Self-inking stamps
- Ink suitable for fabric
- Black ink colour available
- Ink can withstand up to 40 washes
Note: The stamp pad needs to be inked before using to avoid drying out. Please refer to our FAQ section for more details. For the best results when uploading your design, consider using fonts larger than 8 points. Avoid using very small icons or those with thin lines, as our stamps have a limited print area.
For work or play
Looking for a handy way to avoid mix-ups or lost clothing items? Well, say hello to our custom clothing stamps. These versatile self-inking stamps are perfect for labelling cloth-made materials, whether for personal or business use. At home, they’re great for keeping your child’s school uniform or sports kit in order – just stamp your child’s name on their school gear and you’re ready to go. For your business, you can use these stamps to add your logo to fabric packaging supplies, team uniforms, clothing merch and more.
Convenient & durable
Our custom clothing name stamps are built to create lasting impressions. The marks they leave can withstand up to 40 washes, ensuring your label remains intact. Our stamps are made using a combination of rPET plastic and metal, so they’re both sturdy and lightweight. The rPET material is 100% recycled from water bottles, making these stamps an eco-friendly choice.
Easy design experience
Ready to start creating your clothing name stamps? Explore our assortment of fully customisable designs to find the one that’s right for you. (Have a design ready to go? Use our easy design upload option.) You’ll then be able to add your details to customise your design. We’ll take care of the rest, and your clothing stamp will arrive looking crisp and ready to use.
Reviews
Reviewed by 6 customers
-
Add five to eight drops of ink onto the pad before use. Make sure that the ink covers the entire surface of the ink pad.
-
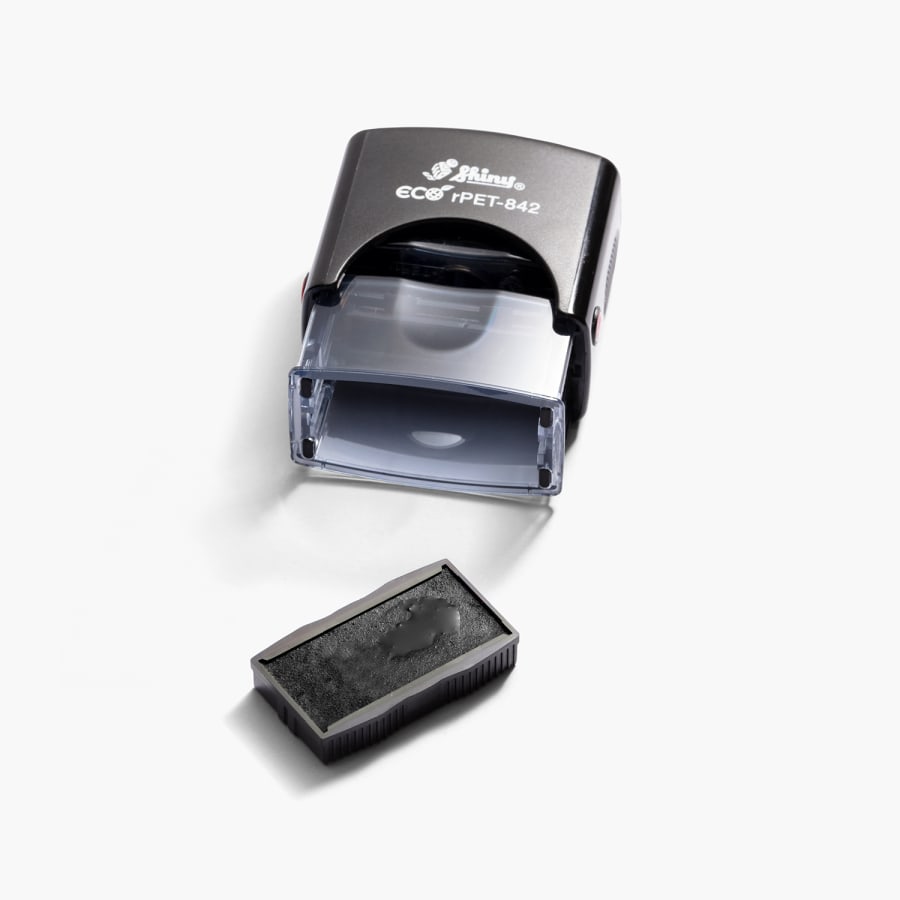
To insert the ink pad, push down slightly on your empty stamp until the grey impression pad moves downwards. This will create a space for you to install the ink pad. Press the two red buttons along the sides to lock this in place.
-
With the inked side facing downwards, insert the ink pad so it sits atop the impression pad. Once you hear a click, your stamp will be ready to go. For the best results, stamp once on scrap paper before using it on the final product.
-
To remove the ink pad, repeat the process of pushing down on the stamp and locking it into place with the red buttons. Then, push the ink pad out from the stamp. Remember to place the plastic lid back on the ink pad to prolong its life.
-
Repeat this process each time you wish to use the stamp. To get the best stamp quality, always add fresh ink to your ink pad whenever you use it.
To ensure the stamp pad does not dry out over time, it is not pre-inked so you will need to add ink to the stamp pad prior to every use. Once you have refilled your stamp pad with ink, you can start using your stamp on clothing items, fabric-based packaging supplies and more.
By following these simple steps, you can easily add ink to your stamp pad:
- Only add 6 to 8 drops of ink to the pad before use
- Make sure the ink bottle cap is properly fastened after opening and stored in a cool, dry place
- After every use, remove the pad and replace the cap to reduce the pads exposure to harsh environmental elements such as excessive heat or dampness.
- For the best results, wipe the die after each use to remove any pigment residue that might still be present.
We are currently offering black ink colour options.
Unfortunately, we don’t offer refills with our stamps at the moment.
With the right care and proper use, these stamps can deliver a minimum of 5,000 impressions.